Masking
Masking is a very powerful technique. The following illustrates a simple animation example of letters being revealed from left to right using a gradient and a text mask.

We start with a circular shape, no border, that is filled with a gradient. On top of that we place a text shape. The text is the mask. Think of it as a cookie cutter. The mask cuts out what is underneath to the extent of its masking depth which in this case is 1. The fill or color of the mask is immaterial. The mask itself is invisible when the animation plays. In the editing environment, the mask is by default visible.

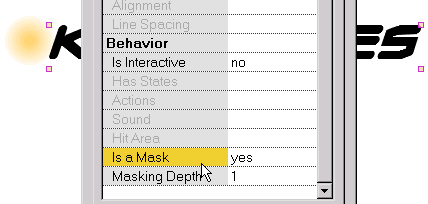
A shape is made into a mask in the property dialog. The depth of the masking effect is also assigned in the property dialog. Anything except buttons can be made into a mask.

In the first frame, the gradient filled shape is positioned to the left of the text. The frame is copied and the gradient filled shape is positioned to the right of the text. During animation, the gradient will sweep across the text revealing the letters.

This is how it looks when the gradient filled shape is underneath the center of the text (in this case the animation would span three key frames).
 To see the effect of the masking, press Ctrl+M. This is how the animation will look when this key frame is played. Ctrl+M removes the masking effect and the mask is made visible again.
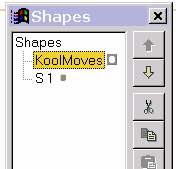
 The shapes dialog identifies masking shapes and shapes which are clipped by masks with two different icons. The mask is always on top of the shapes which are clipped by the mask.